
The Classification screens are where you map your POS data to your GL accounts and approve those mappings. There are three classification screens, one each for Menu Mix, Labor, and Discounts.
All three classification screens work the same way.
Filtering and Finding Items
At the top of each screen:
- Select Account dropdown: filters the list to items currently mapped to a specific GL account.
- Approved / Non-Approved / Review Later / Show All tabs: filter by status. The count next to each tab shows how many items are in that group.
- Search: on the Menu Mix screen, searches across menu item name, GL account, POS Category Name, and POS Sales Category. On the Labor and Discount screens, search is limited to job title or discount name and GL account.
- Download: exports the current list to Excel.
The Menu Mix screen also includes column-level filters for POS Category Name and POS Sales Category (the category names set up inside your POS system).
Mapping and Approving Items
When you connect your POS to clickBACON, we bring in any menu, discount and labor items in your system. Once the initial mapping is complete, you'll only have to worry about approving new items found in your POS which can be done on your bulk review tab.
Use the tabs at the top to switch between Approved, Non-Approved and Review Later. The history button will also show you a history of who approved what items.

You can map any item by choosing the correct GL account from the drop down. Choosing an account here will automatically approve that item.
Use the Review flag to mark an item for later review. You can flag an item regardless of whether it has been approved. This is useful when you want to map and approve an item to keep your DSR moving but still want someone to come back and confirm the mapping is correct.
If you have multiple items that need changes, you can map items in bulk.
- Check the box at the top of the list to select all visible items, or check items individually.
- Once items are selected, you'll see an Approve Item button and a Bulk Update Account button.

- If you click the Approve item button, it will approve each item checked with the GL account chosen on that line.
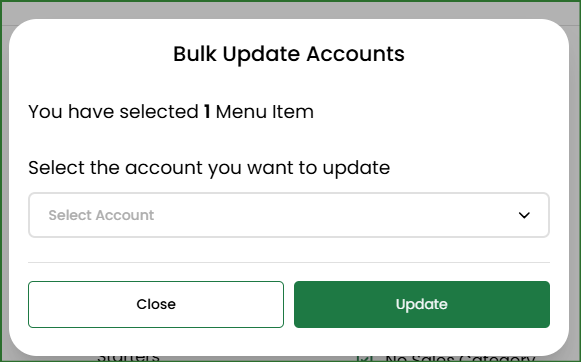
- If you select the Bulk Update Accounts button, a pop up will appear allowing you to assign one GL account to all selected items at once. (On the Menu Mix screen, using the POS Category Name or POS Sales Category filters before selecting all is an efficient way to map large groups of similar items at once.)
Adding a GL Account
If the account you need doesn't appear in the Accounts dropdown, scroll to the bottom of the dropdown and click Add Account. This will take you to the account setup screen. For a full guide on adding and editing accounts, see Adding and Editing your Categories.
Related Articles